How to import tickets from Jira into WannaTrack
Bring a full Jira project across in one pass: tickets, sprints, comments, links, history, and attachments. This guide walks through every step, from creating a Jira API token to watching the import finish.
Moving to WannaTrack should not mean leaving your history behind. The Jira importer pulls a whole project across in a single pass: tickets with their types, statuses, and priorities, plus sprints, comments, issue links, full change history, and file attachments. Most teams are up and running the same afternoon.
This guide walks through the entire process end to end. It takes about ten minutes, and you only need two things: an Atlassian account with access to the Jira project you want to move, and a WannaTrack organization to import it into.
Step 1: Create a Jira API token
WannaTrack connects to Jira using an API token tied to your Atlassian account. The token lets us read your project on your behalf, and you can revoke it at any time.
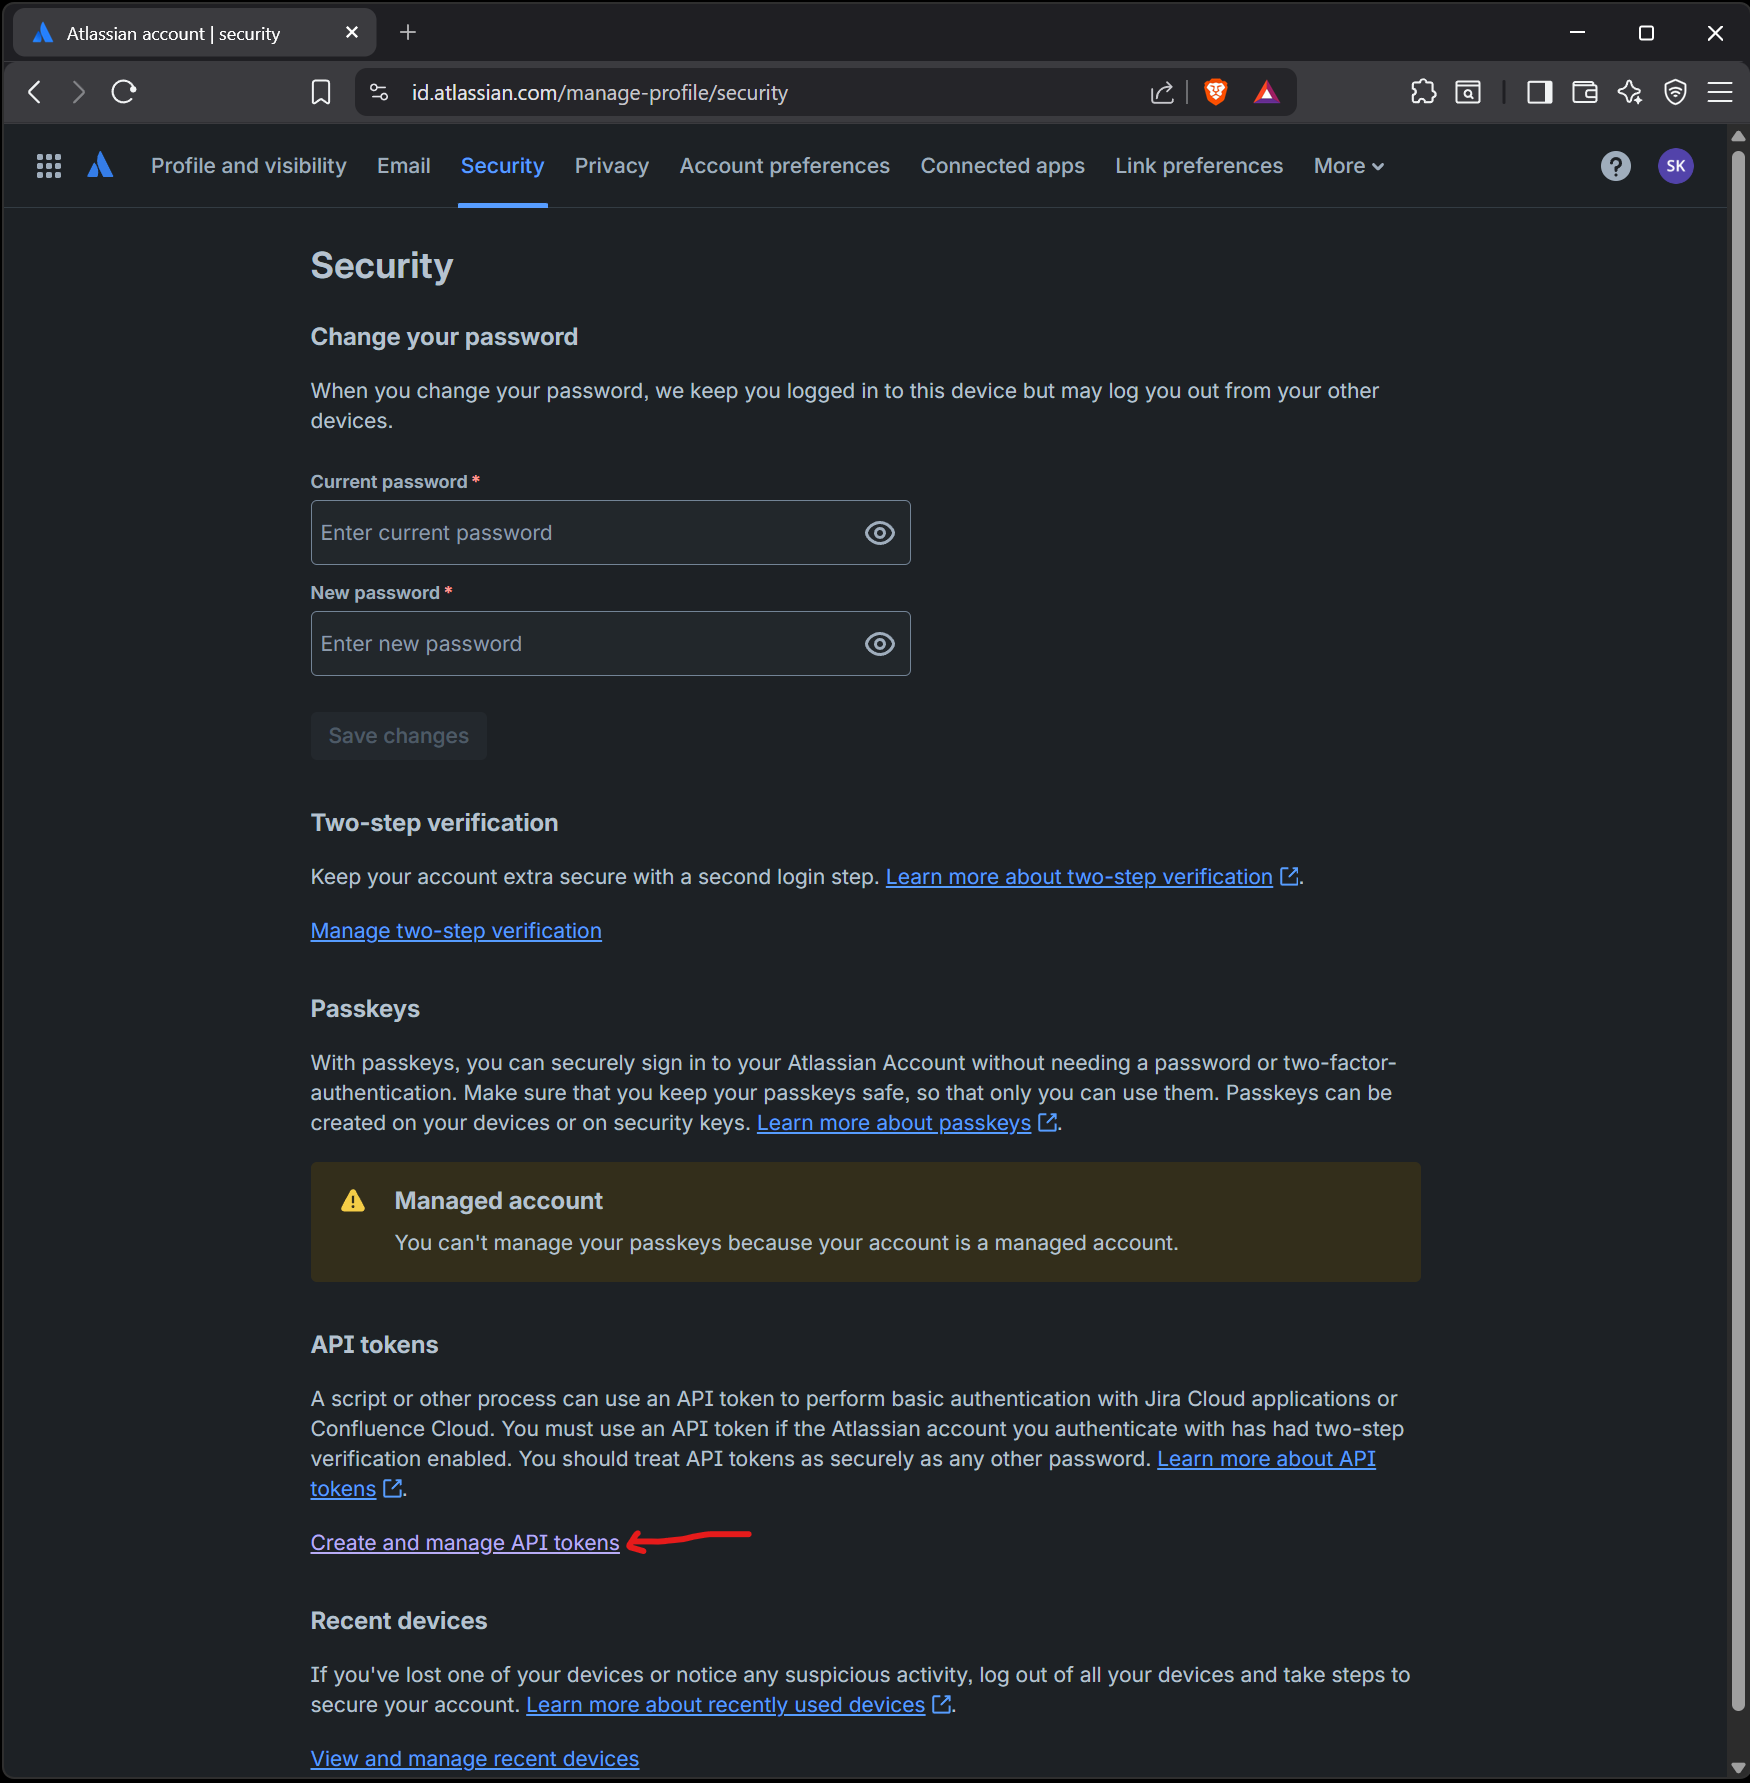
Sign in to id.atlassian.com and open the Security tab. Scroll down to the API tokens section and select Create and manage API tokens.
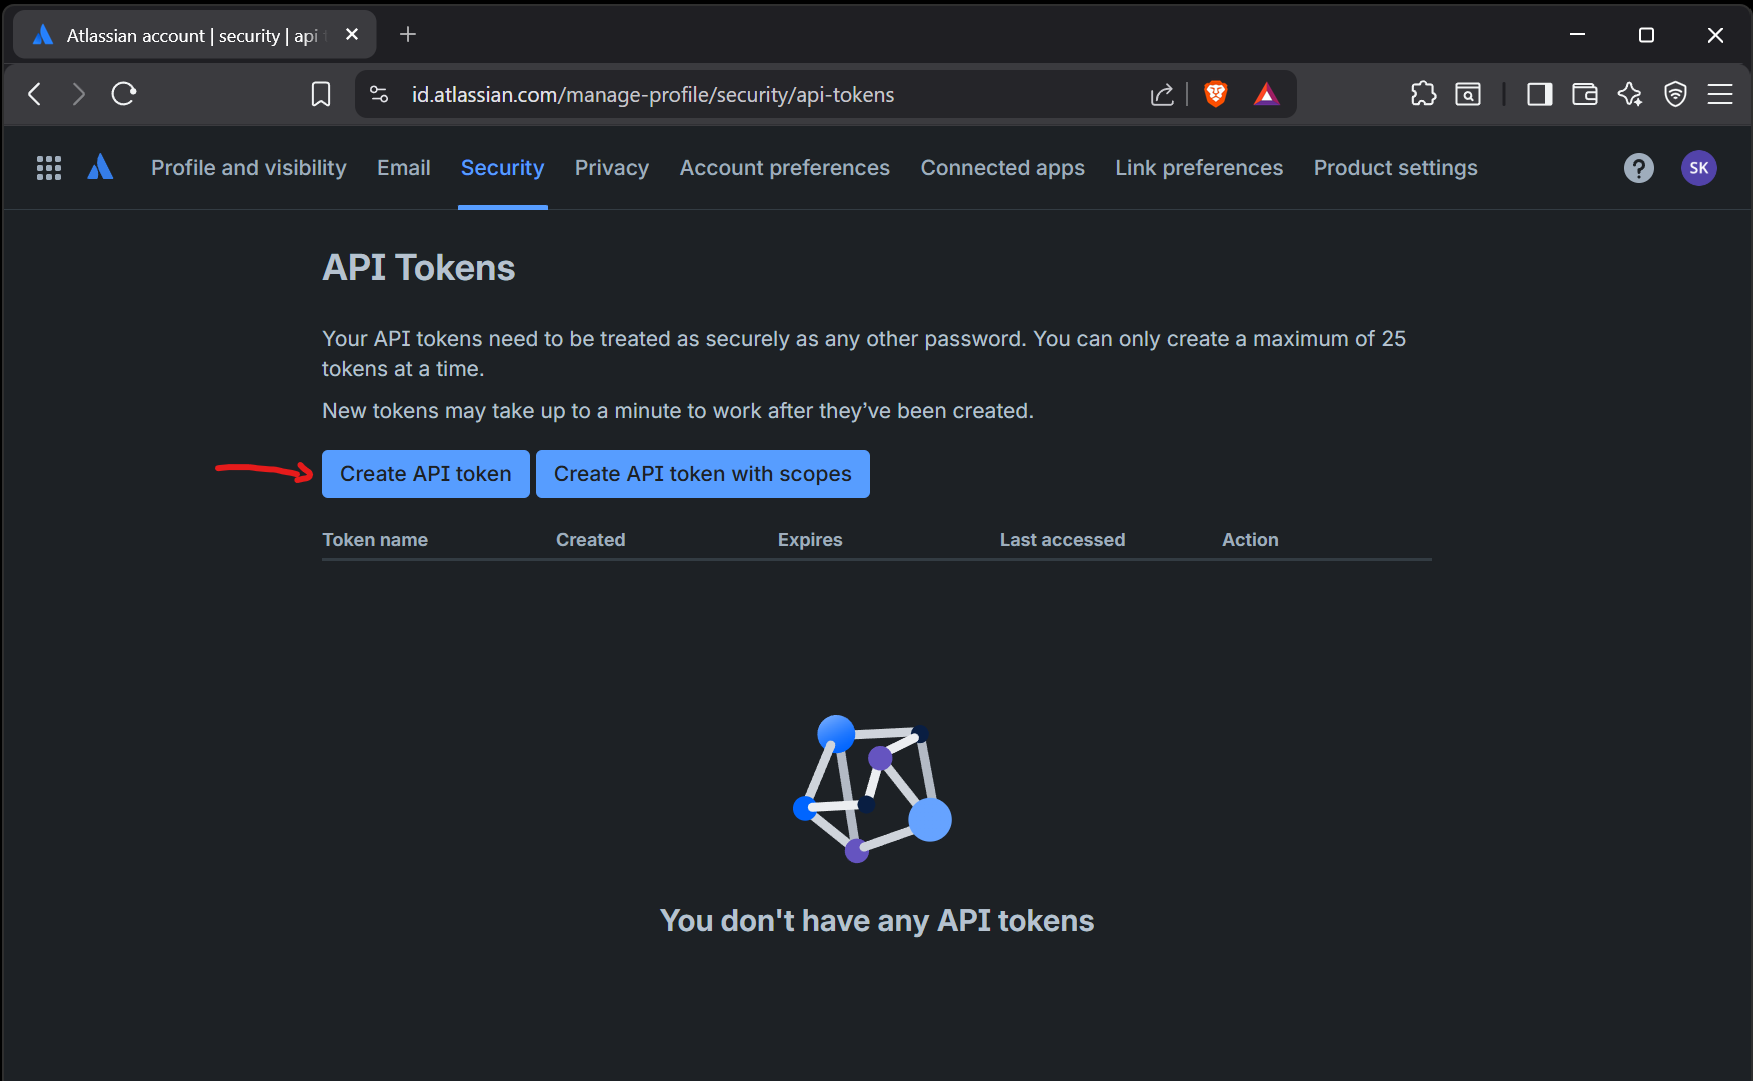
On the API tokens page, select Create API token. Use this option rather than "Create API token with scopes", which produces a different kind of token.
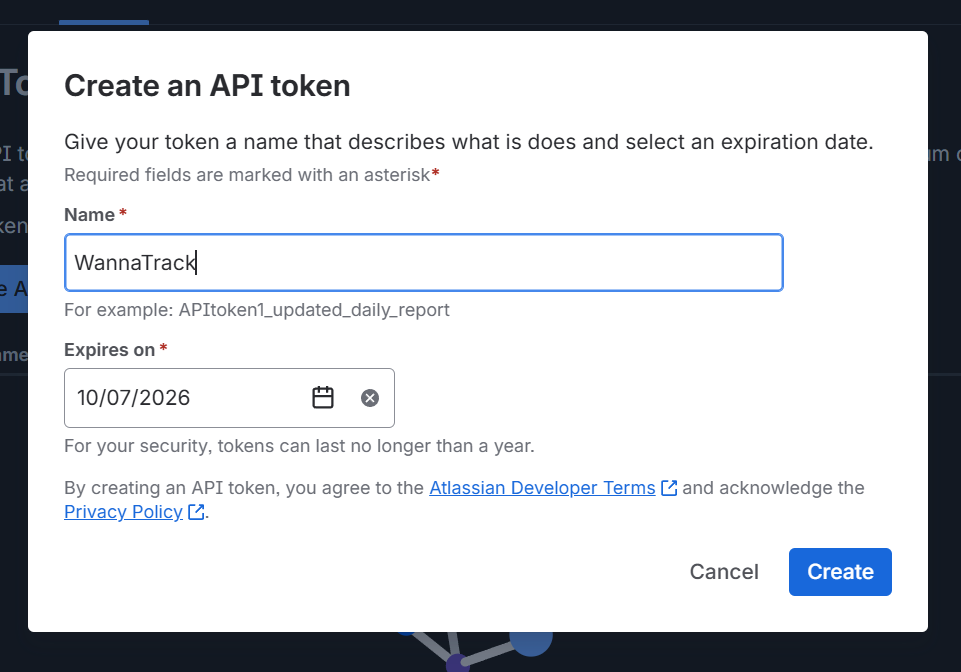
Give the token a name you will recognise later, such as WannaTrack, and pick
an expiry date. A token can last up to a year. Select Create when you are
done.
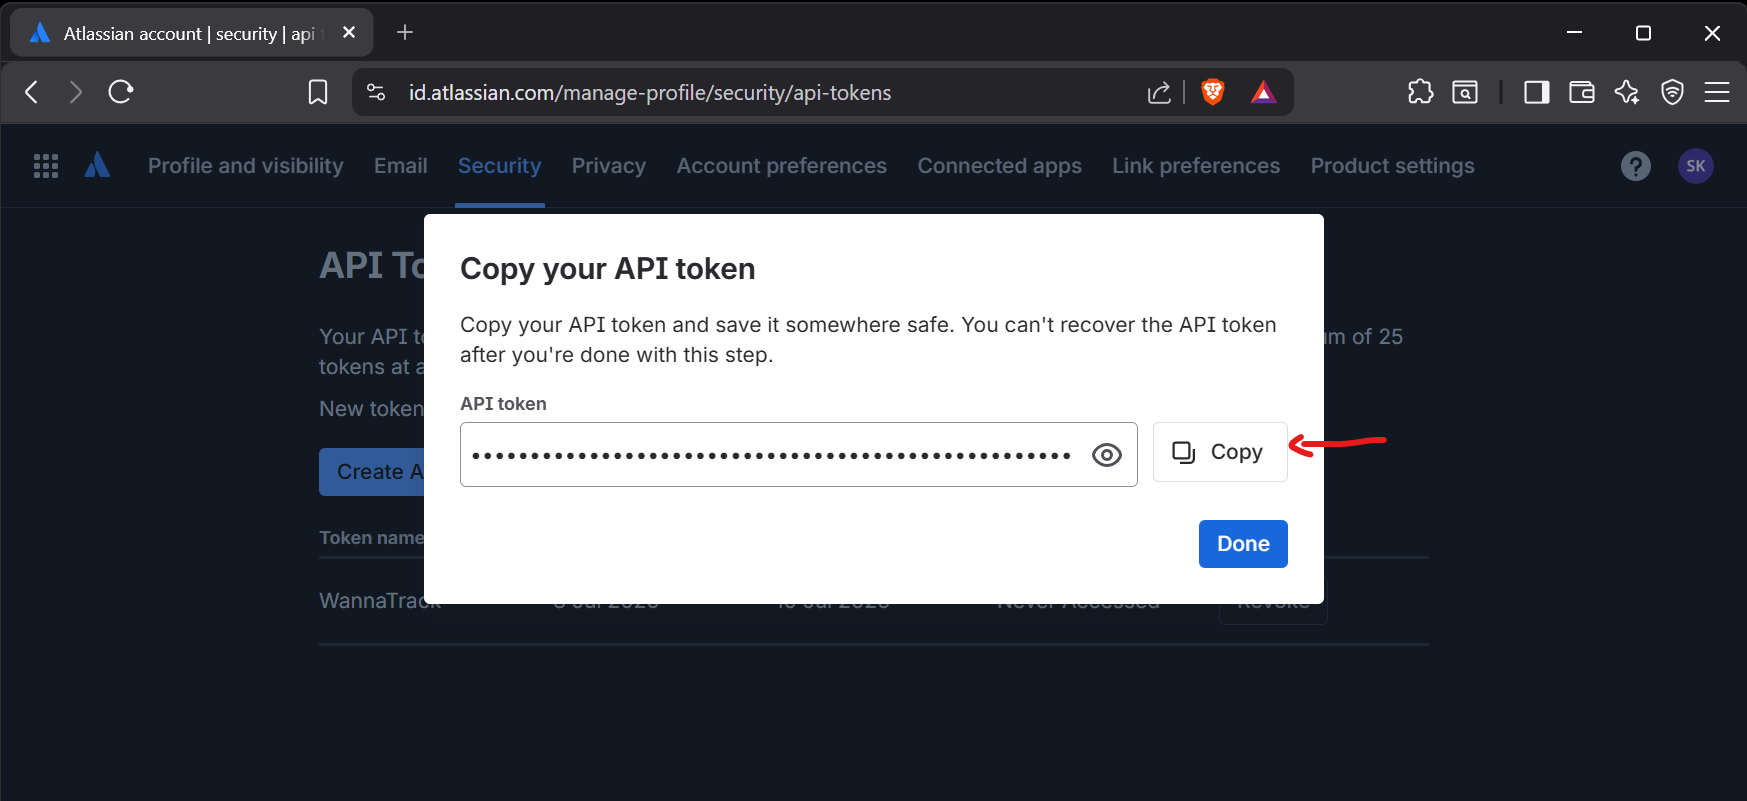
Atlassian shows the token once and only once. Select Copy and keep it somewhere safe for the next step. If you lose it, you cannot recover it, but you can always create a new one.
Step 2: Open the importer in WannaTrack
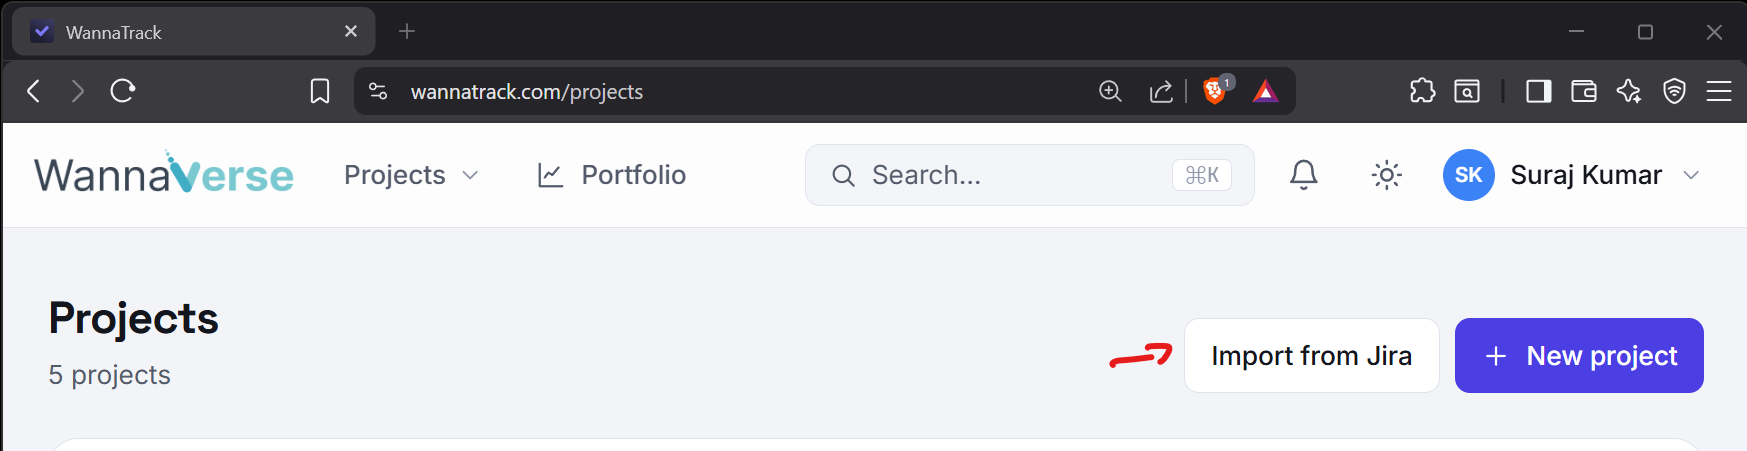
In WannaTrack, go to your Projects page and select Import from Jira in the top right.
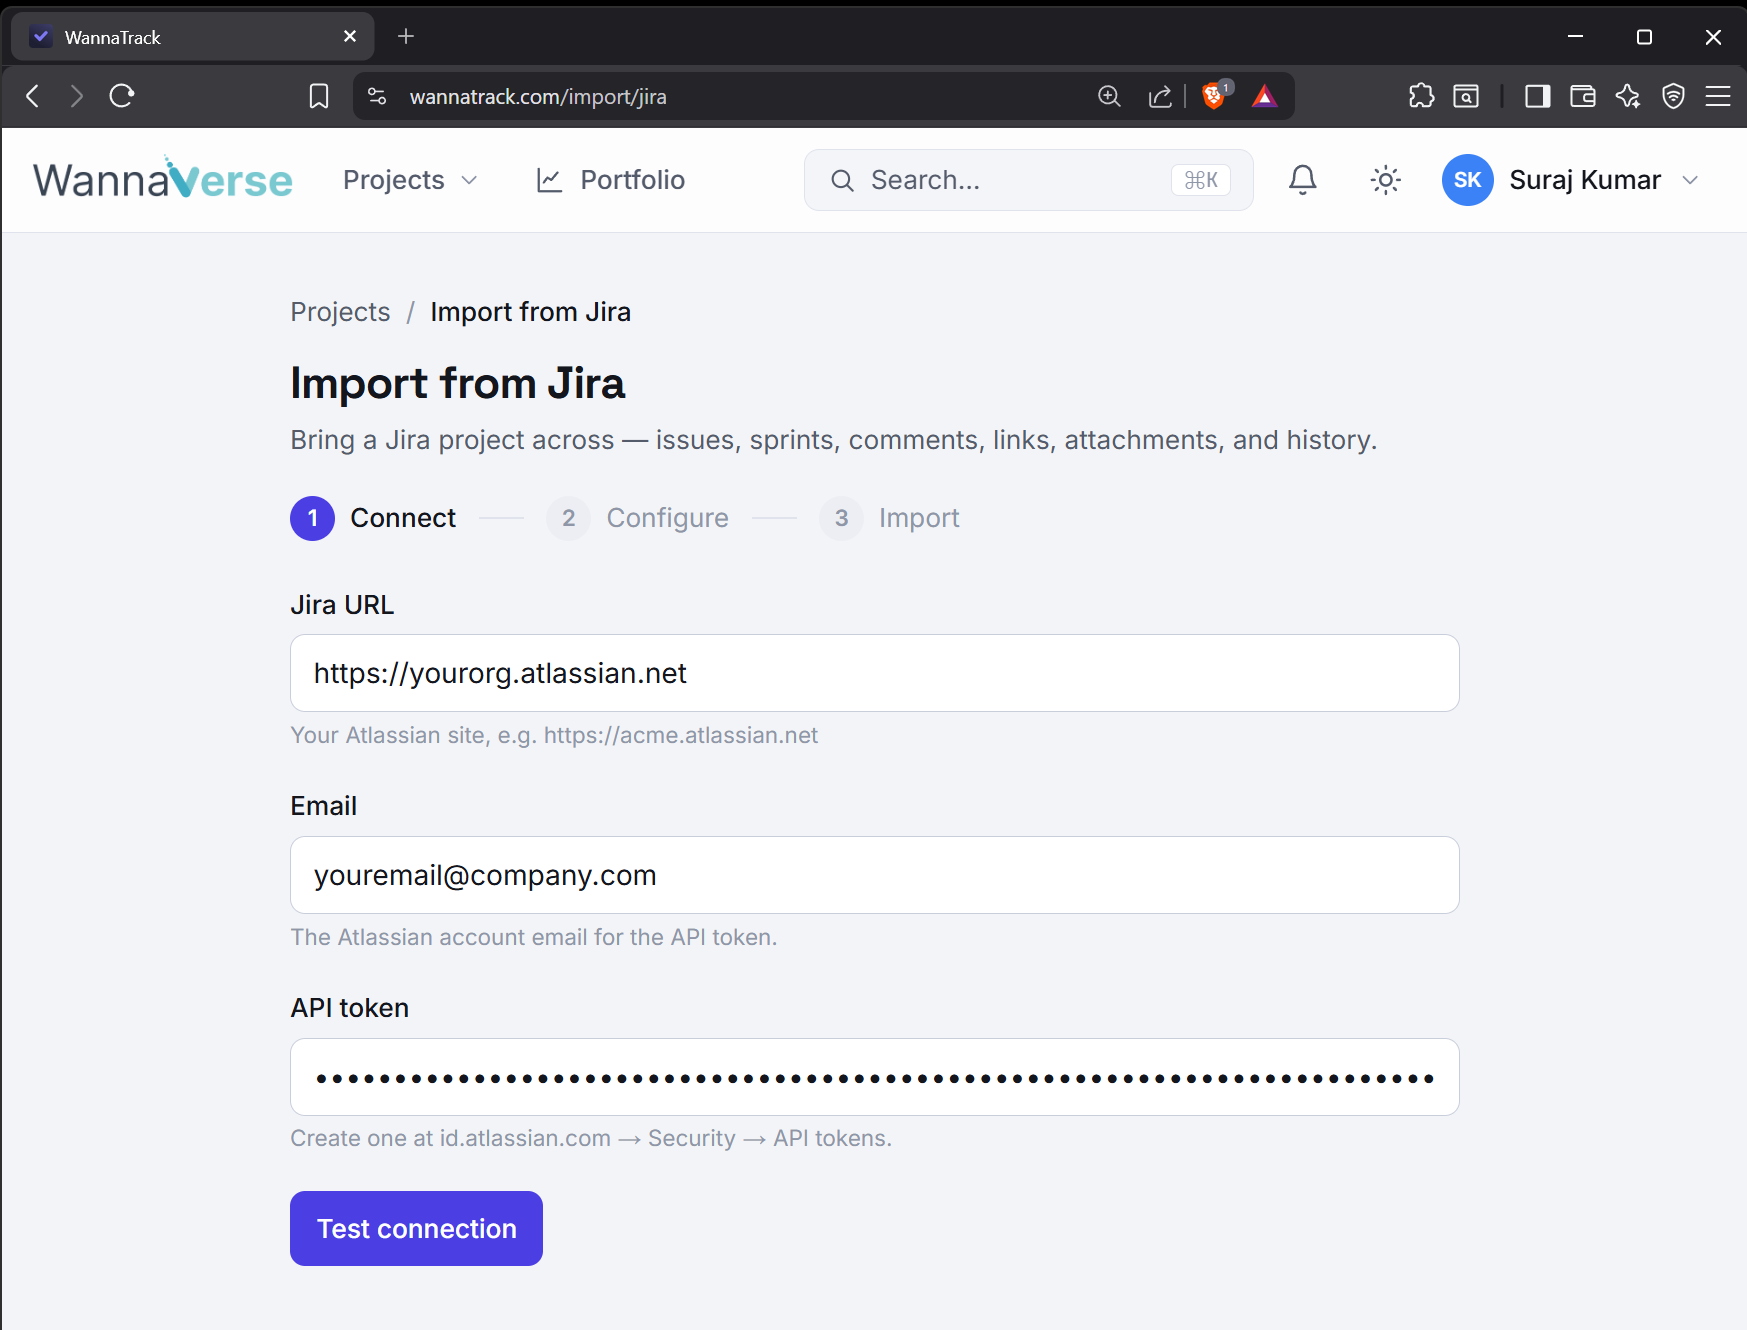
The importer runs in three steps: Connect, Configure, and Import.
Step 3: Connect to Jira
Fill in the three connection fields:
- Jira URL is your Atlassian site, for example
https://acme.atlassian.net. - Email is the Atlassian account email that the API token belongs to.
- API token is the token you copied in step 1.
Select Test connection. WannaTrack checks the credentials and lists the projects you have access to. If the connection fails, double check the site URL and confirm the token was pasted in full.
Step 4: Choose what to import
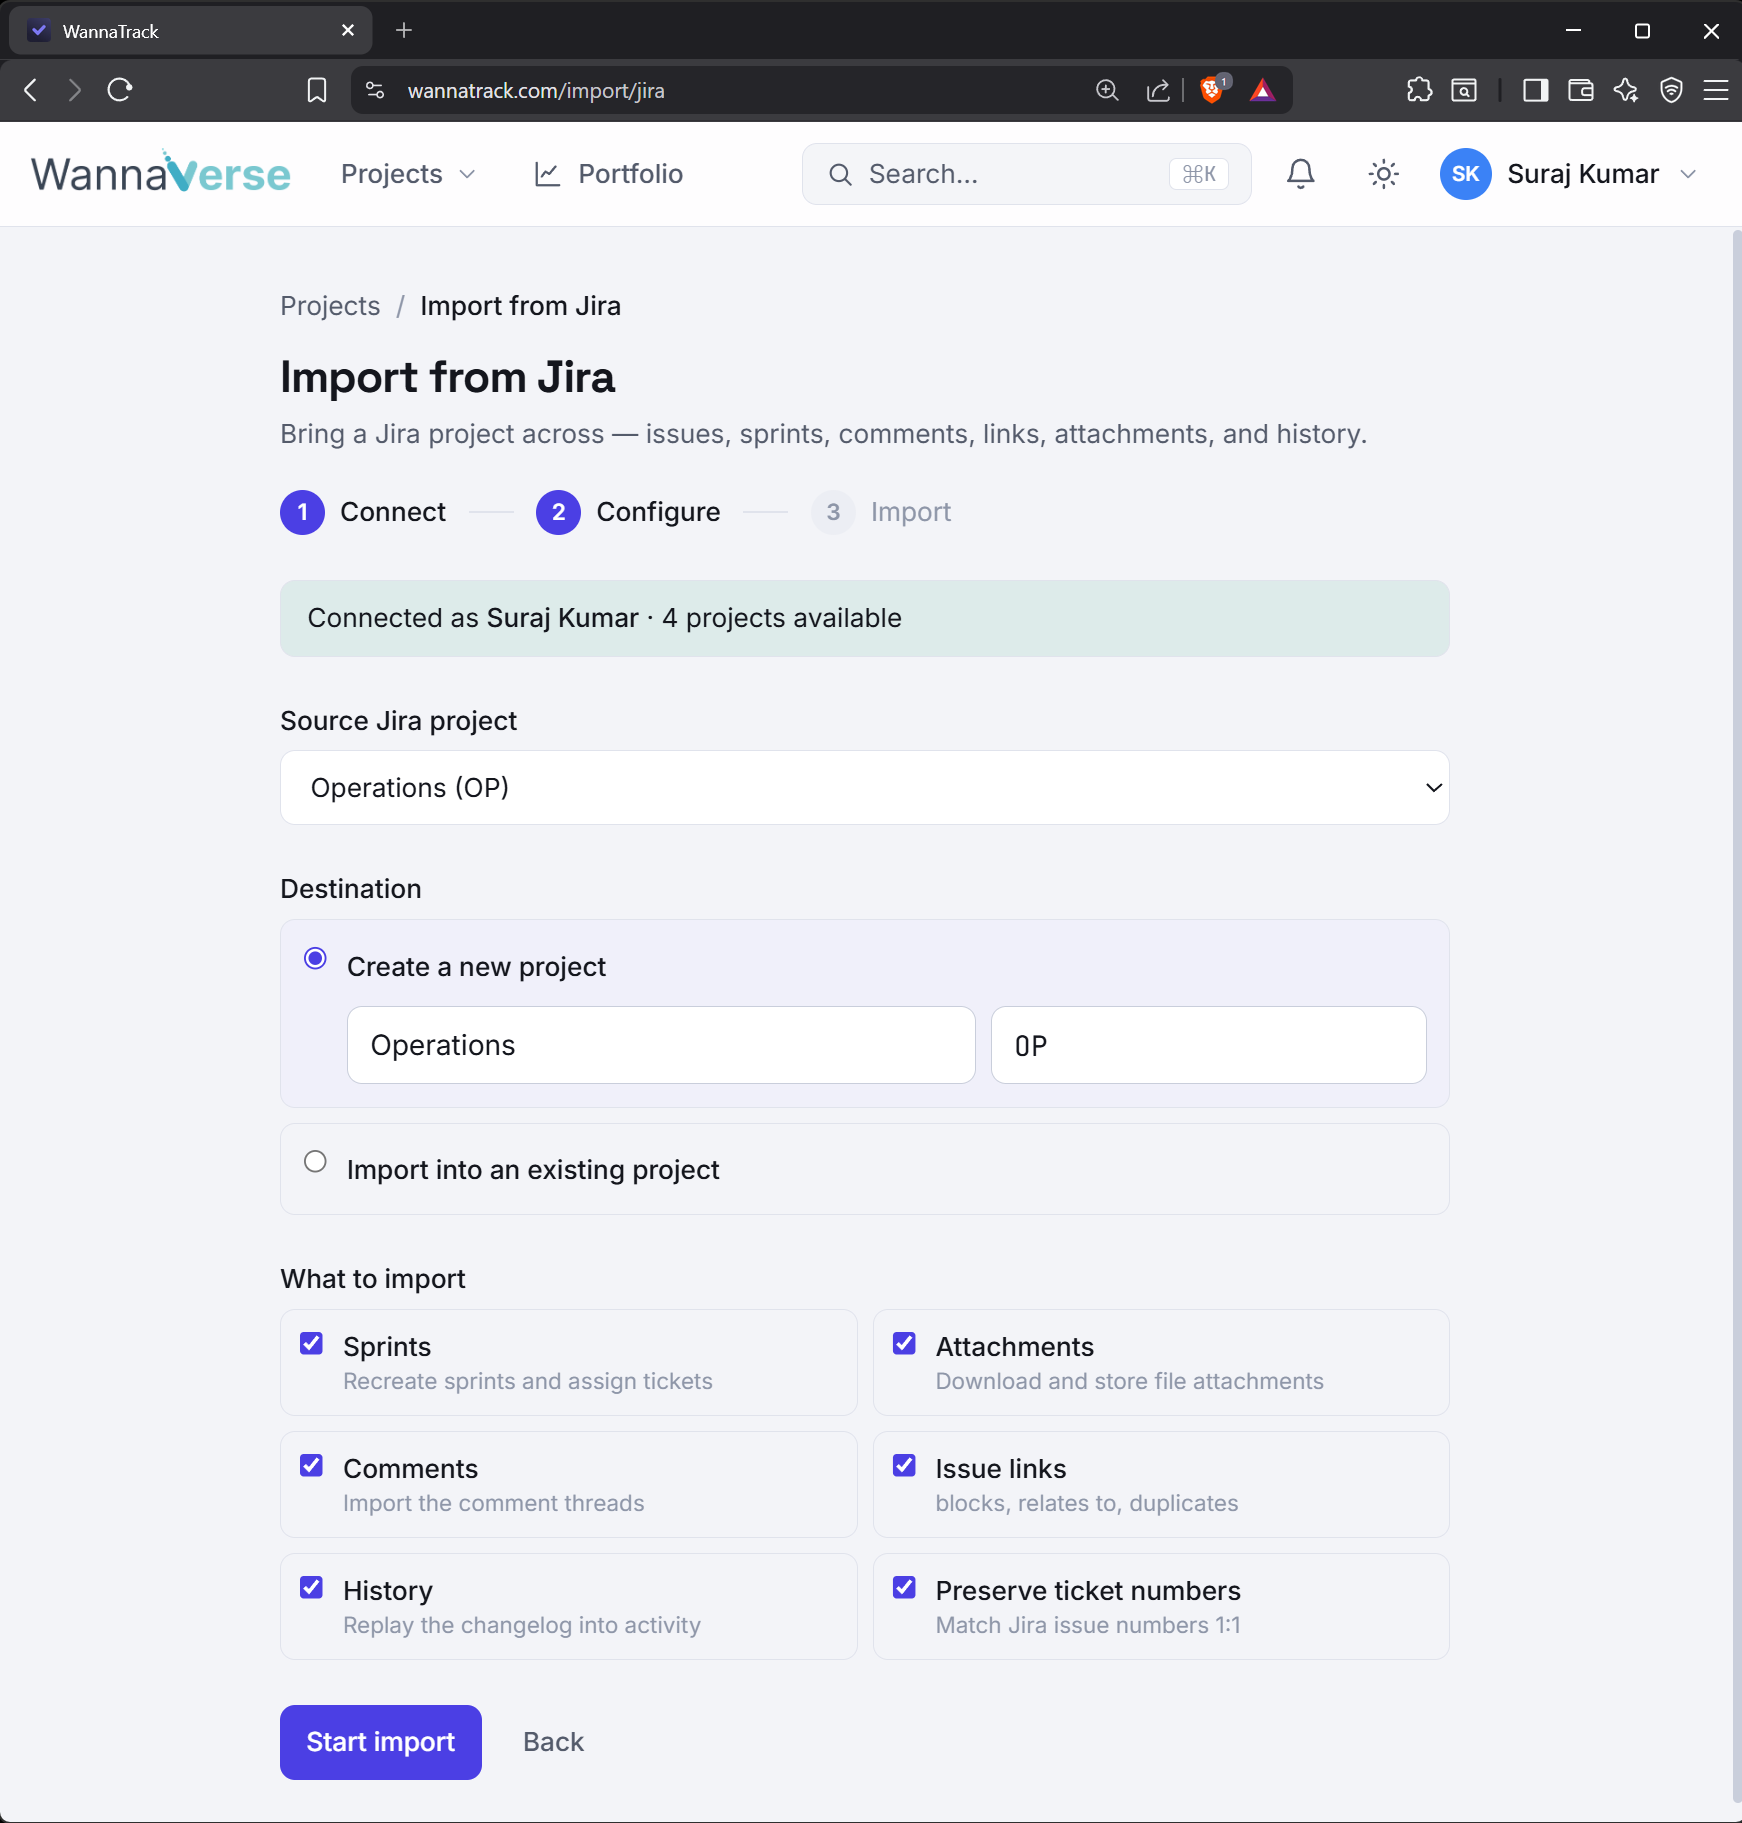
Once connected, you will see a confirmation of who you signed in as and how many projects are available. Now configure the import:
- Source Jira project is the project you want to bring across. Pick it from the list.
- Destination decides where the work lands. Choose Create a new project to start fresh, then set a name and a project key. Or choose Import into an existing project to add the tickets to a project you already have.
- What to import lets you include or exclude sprints, attachments, comments, issue links, and history. Preserve ticket numbers keeps your Jira issue numbers matched one to one, so existing references still make sense. Every option is on by default, so you can leave them as they are for a complete copy.
When everything looks right, select Start import.
Step 5: Watch the import finish
The final step shows a live progress view with a running count of tickets, sprints, comments, links, attachments, and history entries as they come across. Large projects can take a few minutes, and you can leave the page open to follow along.
When it finishes, select Open project to jump straight to your new board. Everything is in place: your tickets sit in the right columns, sprints are recreated, and the audit trail comes with you.
A few things to know
- Attachments are re-hosted. Files are downloaded from Jira and stored on your WannaTrack tickets, so they keep working even after you turn Jira off.
- The import is additive. Running it again, or importing into an existing project, adds work rather than overwriting what is already there.
- Your token stays in your control. If you no longer need it, revoke it from the same Atlassian API tokens page you created it on.
That is the whole process. Point WannaTrack at your Jira project, choose what to bring, and let it run. When it is done, your team can pick up exactly where they left off, with nothing left behind.